Editor’s note: This is complex topic. My list of parts may not look like your list of parts. It depends on what you intend to build. So I’m looking for constructive criticism. We want to be exhaustive, so let us know what we’re missing.
- What’s missing from the list?
- If you have built an AR, what tools proved useful to you?
- Have recommendations about the best brands, or where to find the best prices?
Let us know in the comments below. We’ll be editing this as a work in progress until we cover all of the possibilities.
THE SERIES
- Part 1: Build an AR-15: The Series Introduction
- Part 2: Build an AR-15: AR Calibers
- Part 3: Build an AR-15: Direct Impingement or Piston Operation
- Part 4: Build an AR-15: Tools and Materials
- Part 5: Build an AR-15: The Lowdown on Lowers
- Part 6: Build an AR-15: Intro to Uppers
- Part 7: Build an AR-15: Barrels
- Part 8: Build an AR-15: Choose The Right Buttstock
- Part 9: Build an AR-15: Choosing the Right Optic
Breaking it down
In order to tackle this project effectively, you have to have a clear understanding of where to start. If you’re reading at your computer–in relative privacy–I’d suggest you fire up some Johnny Cash. I’m not suggesting that you steal all of the parts from your employer (if you’re lucky enough to work for a company that sells or makes rifle parts), but you have to take it one piece at a time.
Think about your future rifle in terms of its most basic parts. When it is fully assembled, it is one cohesive unit. The most basic breakdown begins when you separate the upper from the lower. The upper has the actual upper, the bolt carrier group, the barrel, the forend…. The lower has the serialized receiver, the stock, the grip, the controls, maybe the magazine. Each of these items breaks down into smaller groups of parts. While it might look like an odd pile of scrap metal when it is all broken down, every little piece has its place.
And many of these little parts require special tools. That’s the other kicker here. If you are looking at building one AR–only one–then you may end up spending more than you plan on tools and parts. Most of us justify the expense of dedicated tools by openly acknowledging that we will be building and maintaining multiple guns.
[one_third]
Upper Receiver
Upper Large Parts
- Stripped upper Receiver
- Crush Washer
- Ejection Port Cover
- Ejection Port Cover Pin Snap Ring
- Flash hider
- Forward Assist
- Barrel
- Barrel Extension
- Bolt
- Bolt Carrier
- Firing Pin
- Charging Handle
- Charging Handle Latch
- Free Float Tube Handguard
- Gas Tube
- Gas Block
[/one_third][two_third_last]
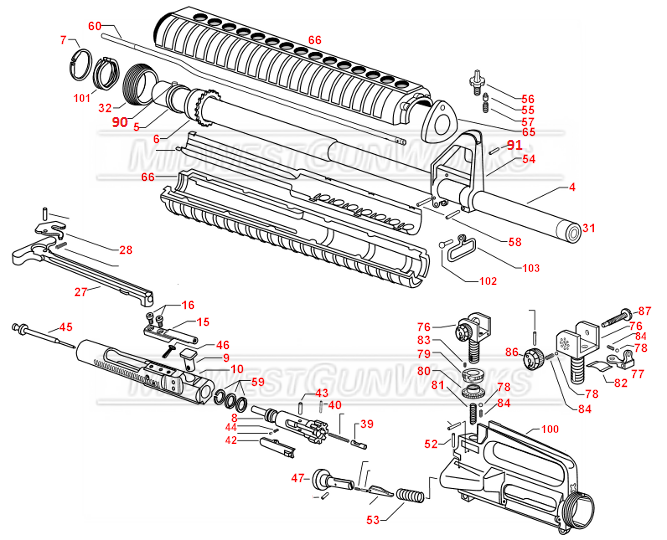
Often retailers will have helpful schematics designed to illustrate the placement of parts. This one is from Midwest Gunworks.
[/two_third_last]
[two_third]
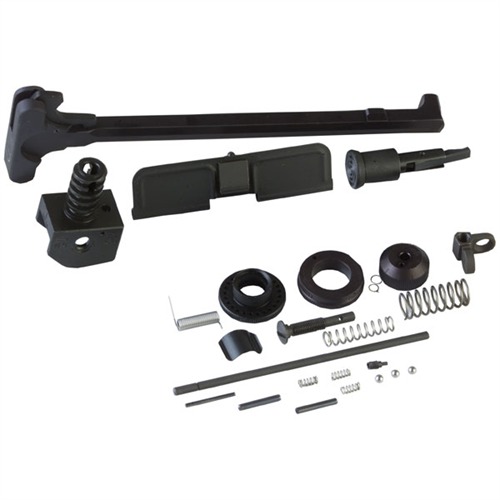
One of the good things about parts is that they can be mailed directly to you–all but the receiver itself. This A2 parts kit is a package from Brownells.
[/two_third][one_third_last]
Springs
- Forward Assist Spring
- Ejection Port Cover Spring
- Charging Handle Latch Spring
Pins
- Forward Assist (Roll) Pin.
- Ejection Port Cover Pin
- Bolt Cam Pin
- Firing Pin Retaining Pin
- Charging Handle Latch Roll Pin
- Gas Tube Roll Pin.
[/one_third_last]
[one_third]
Lower Receivers
Lower large parts
- Stripped Lower Receiver
- Bolt Catch
- Buffer
- Buffer Retainer
- Castle Nut
- Disconnector
- Hammer
- Magazine Catch
- Magazine Catch Button
- Pistol Grip
- Pistol Grip Lock Washer
- Pistol Grip Screw
- Receiver Plate
- Selector
- Stock
- Trigger
- Trigger Guard
[/one_third][two_third_last]
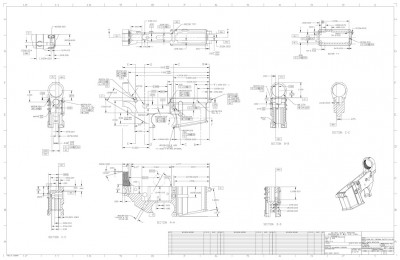
Blueprints are useful, but not as handy as a well illustrated schematic. You’ll need to know a lot about your lower, maybe not this much. But if something doesn’t work right, you could be looking at these numbers very closely.
[/two_third_last]
[two_third]
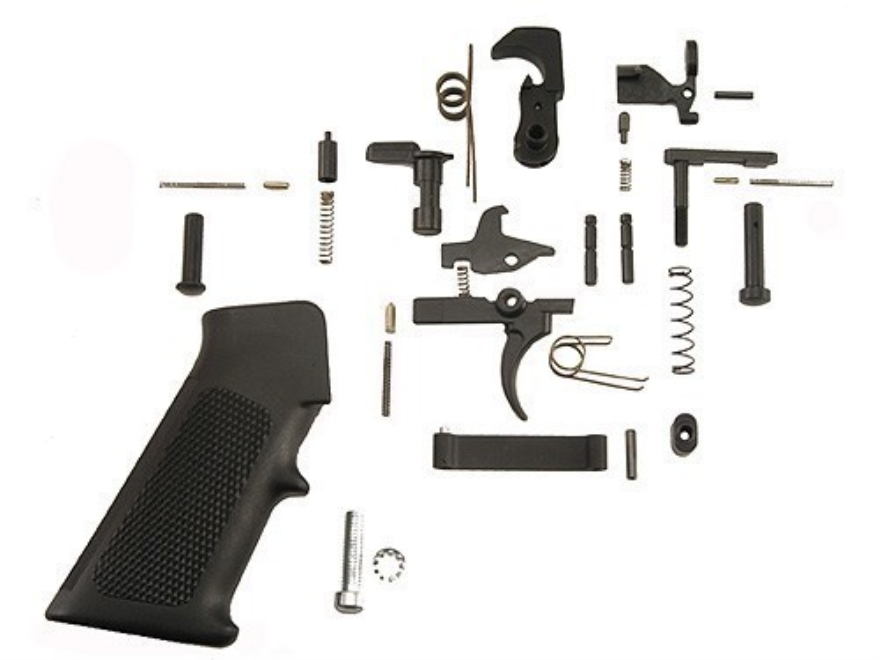
Most parts kits look the same, but there are some distinctions we’ll get into in greater detail. This lower kit is from Midway.
[/two_third][one_third_last]
Springs
- Bolt Catch Spring
- Buffer Retainer Spring
- Buffer Spring
- Disconnector Spring
- Hammer Spring
- Magazine Catch Spring
- Pivot Detent Spring
- Selector Spring
- Takedown Detent Spring
- Trigger Spring
Pins
- Bolt Catch Buffer
- Bolt Catch Roll Pin
- Hammer Pin
- Pivot Detent
- Pivot Pin
- Selector Detent
- Takedown Detent
- Takedown Pin
- Trigger Guard Roll Pin
- Trigger Pin
[/one_third_last]
Tools
We’re not done yet. That list up top may seem daunting, but you have to have almost all of those little bits and pieces in order to make things work like they should. Tools, on the other hand, are a different matter. A tool is a tool. If you have one made specifically for the job, you may have an easier time getting that job done. And there are a lot of tools designed for AR builders.
And now would be a good time to talk about the difference between an AR builder (one who is capable of building an AR), and Armorer (one who might build an AR, keep it running, trouble-shoot, fix problems, etc.), and a gunsmith (one who could make parts for the rifle from raw ingredients). Armorers require a certain level of expertise that comes from training and (more often than not) apprenticeship. Gunsmiths have more training, and often have a set of skills that extend to a wider variety of firearms (whereas an armorer may only have expertise in one platform). Each of these people will need a more specialized set of tools.
Since we’re talking about building an AR, and not milling steel, we’ll keep it confined to the basics. The tools in the list below can be picked up from any of the parts supply houses. Some are available at a hardware store. You may already have some. If you want a specialized set, they come pre-packaged.
- Bench with vise (you’ll need to clamp some things down before torquing nuts)
- Receiver bocks for upper and lower (specially made blocks hold aluminum parts secure without crushing them)
- Punch set (pony up for one with a wide variety of sizes)
- Roll pin punch set (a normal punch mauls roll pins–ask me. I know)
- Nylon/brass hammer (these do a number of jobs without marring metal)
- Ball peen hammer (sometimes a steel hammer is needed)
- Combo wrench for the buffer tube, barrel nut, flash hider (these are great to keep handy–a specialty tool)
- Torque wrench (we’ll be getting scientific later in the process, and this will help with measurements)
- Screwdriver set with hex heads (useful for all sorts of tasks)
- Head space gauges (again with the precise measurements)
Are all tools the same? Obviously not. Think about it in this dichotomy. You can buy a $300 .45 ACP that will hurl a small piece of lead down range. You can spend $3,000 on a .45 ACP that will hurl a small piece of lead down range. Can the target tell the difference? Negative. Can you? I bet you could.
Some tools, like screw drivers, are purpose built to break if you exceed the recommended torque. This is a good thing. Normal screwdrivers may not be so forgiving. And some tools that are made from brass are designed to strike steel without chipping, scratching, or (for you muzzle-loaders and re-loaders) sparking. Brass hammers, nylon hammers, nylon blocks, blocks of wood… it is really up to you. As with most hobbies, there is someone out there who will sell you the exact thing you need to achieve a very specific task. And it will get ludicrously expensive. But you’ll have a kick-ass tool box at the end.
Or you can do like most of us do, and wing it. When I’m building something, I’ll run across a specific need, and see what tool I already have that will solve the problem. If I can’t with what I have on hand, I’ll hit the hardware store in-town. If I can’t find instant gratification there, I’ll hit the internet and wait a couple of days.
It is really up to you and your budget. How much do you want to spend on the one build? Are you going to get use out of other tools–enough to justify the expense? Is it better to buy a set of tools, or pick up only the ones you need?
Regardless of how you decide to do it, you will need some parts and some tools. And if you’re playing along at home, and getting ready for the build, now’s the time to start spending money.
[one_half]
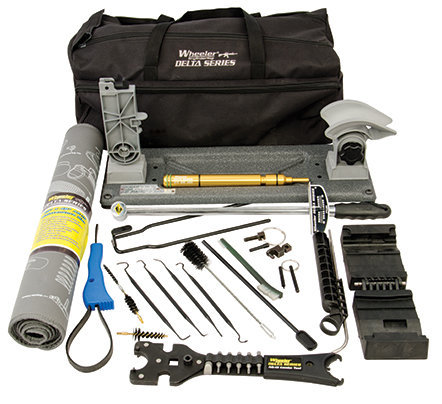
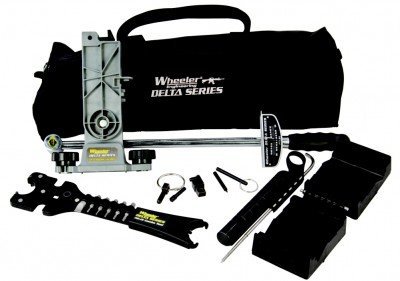
Wheeler Engineering’s Professional AR Armorer’s Tool Kit. Everything you need?
[/one_half][one_half_last]
[/one_half_last]
